Q4. How did use media technology in the construction, research, planning and evaluation stages?
Media technology has been the core of this project, in most aspects of the development, pre-production and post productions; Technology has been used in one way or the other whether it was used in editing, filming or uploading we have acquired the skills to fully utilize media technologies to enhance our final pieces having technology has been a great bonus, and without it this project would have been merely impossible.
|
Planning & research (Development & Pre-production)
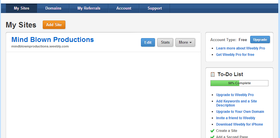
Viewing existing films trailers we noticed that most of them have websites in there credits, so we then implemented into thought to create our very own website to display all of our work, however we needed a domain to present our project, in which the solution was weebly. Being a user-friendly, widget based website weebly had been very useful and convenient, also it allowed us to portray professionalism and was the very inportant backbone of the whole structure of our website: www.mindplownproductions.weebly.com. Giving us a url allowed us to share are website with Twitter and Facebook also media technologies.

|
|

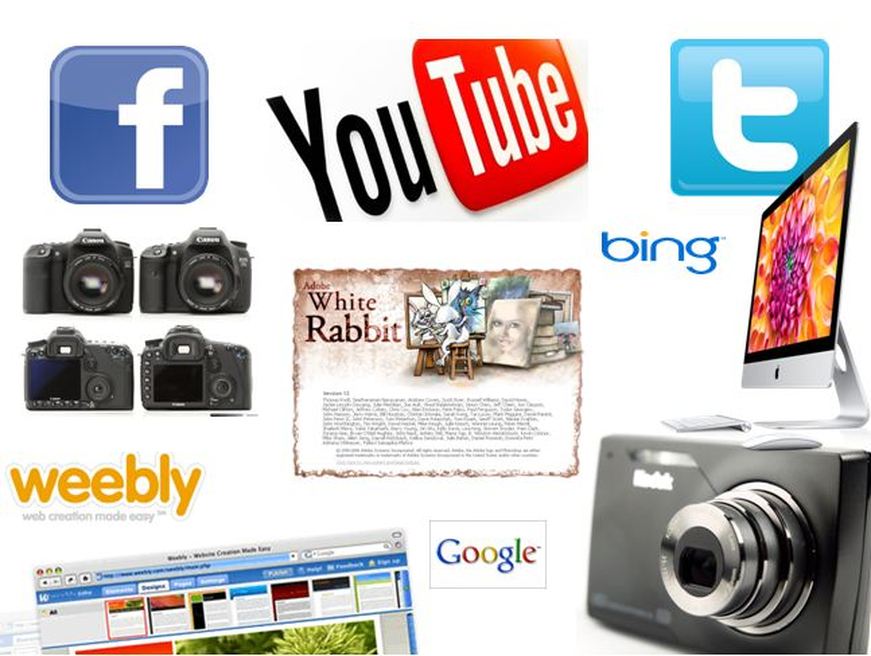
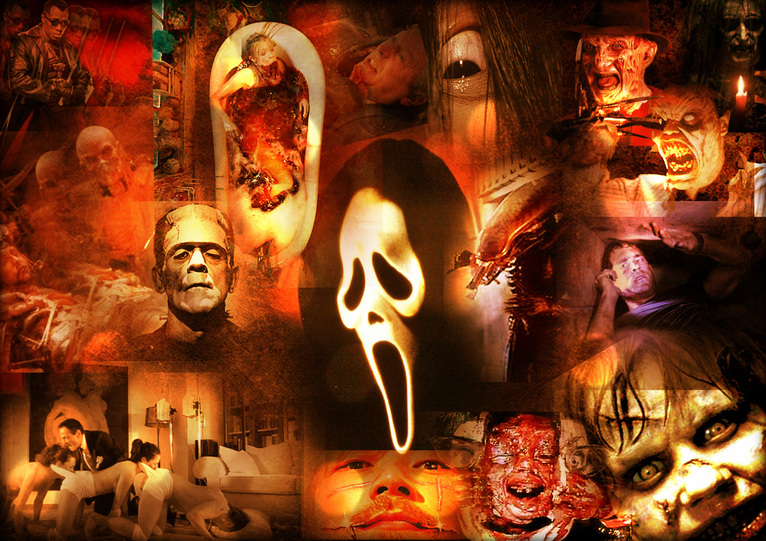
The use of search enginesIn our research and development we used many different media technologies to construct and scaffold in this project which had a huge impact on the overall completion, the main one that was used was the search engines google and bing, which we extracted from to create moodboards and research on the different horror genres e.g. Slasher, J-horror, Splatter, Monsrer and various other genres shown in moodboard below.
Google.com
|
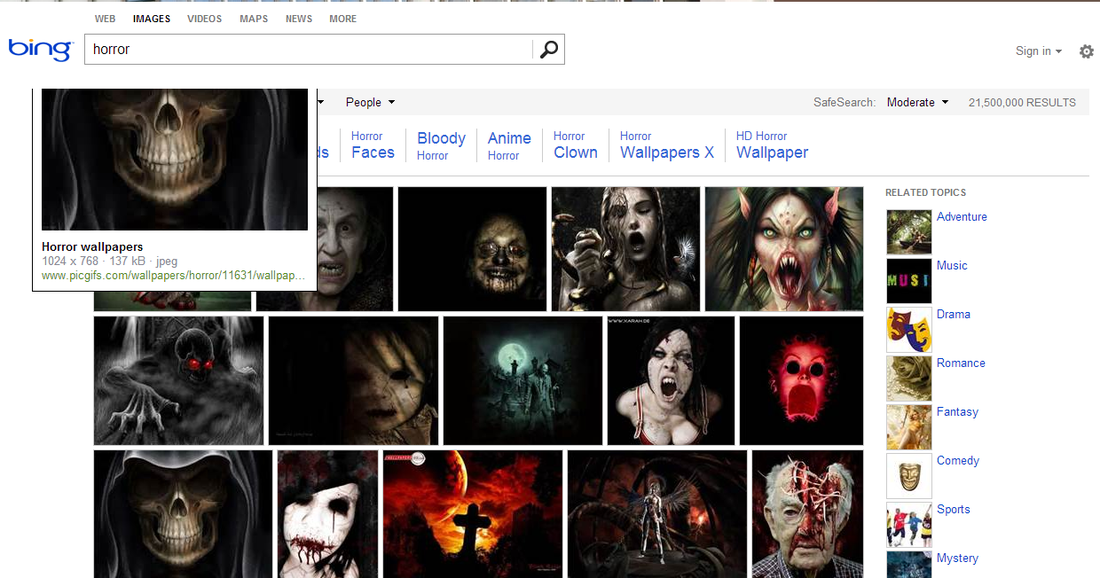
Bing.com
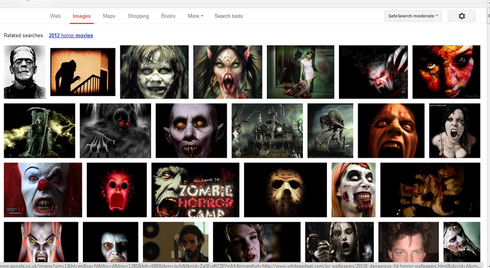
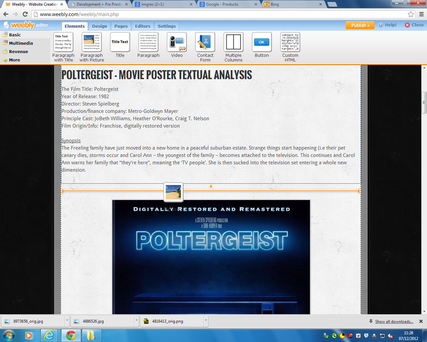
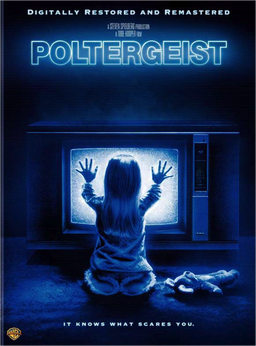
Not only for searching both these websites allowed for great organization as they are linked with e-mail service e.g. G-mail and Hotmail the advantage of this is when we were logged in with G-mail we were logged into our YouTube accounts, this avoided us have to disturb each others research by asking for the details. Also Google played an essential role in our Textual Analysis allowing us to get magazines and posters to analyse which are show below plus example of how image was adding using weebly.
|
|
|
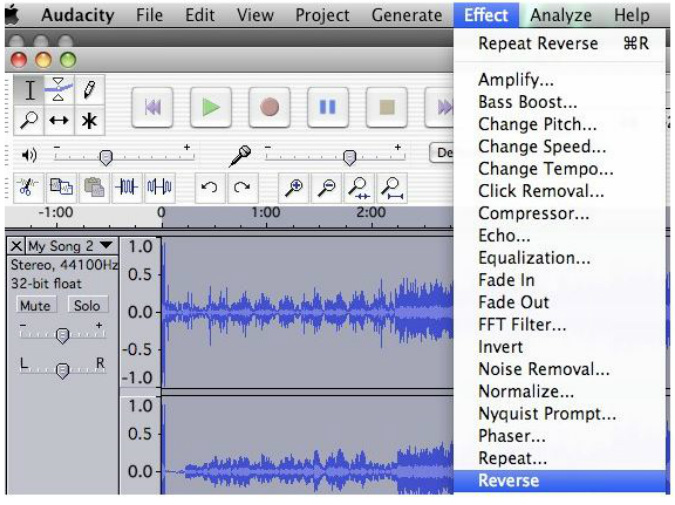
Using audacityFor our research on the horror genre, one of our member decided to create a sound clip in which he used the sound editing and recorder program audacity to manipulate sound making them sound creepy and in particular eeri.
Above is the sounds that were created via Audacity. Have a listen!
Using audacity gave us an insight into how sounds can be manipulated to give it a more scary tone, which we Incorporated into the sound on our final trailer, thus bringing the shots to life and that edge needed to display more professionalism. Also the sounds that were made in audacity were original recording that were manipulated sounds such as the jangling of keys were use allowing for more creative exploration.
|
|
||||||
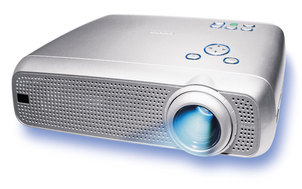
HOW POWERPOINT PLAYED A PARTPowerpoint that helped us to present our 'three horror movie concepts' to an audience, which was how our trailer, poster and magazine spawned, without this and a projector -a media technology- it would be harder and more time consuming to showing the information to everyone individually and gain there feedback.
|
This was a quick way of displaying information to a large group of people keeping us organised with the slides in chronological order. These ideas were first created on paper and then onto a single PowerPoint. An example of a PowerPoint is displayed below. |
the importance of youtube

YouTube is a video-sharing website, which we have used to display our meetings and also some of our audience research, this particular form of media technology was useful in the sense that with the media technology Weebly, it made it easy to add YouTube videos to our website without have to write out long codes of html.
|
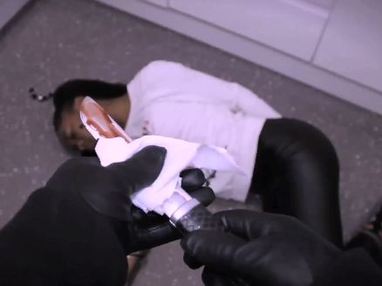
YouTube was a fairly easy to use media technology; as it displayed a very user friendly format, in which the upload button -one of very prime processes used to construct are different stages-, was located right of the search bar. In terms of planning and research we used YouTube as a source of tutorial, noting down conventions of existing trailers and also for displaying our audience research, so we that the data we acquired was portable and able to be viewed from anywhere with internet access. We used YouTube for a various array of things such as tutorials, which were used to enlarge our knowledge e.g. watching a video that taught us how to make fake blood, in which we manifested in our trailer, how this was utilized was by us following the steps of the video. Another example of why we used YouTube is that it allowed us to video share easier and put our videos on Weebly, Facebook and Twitter, by clicking the share button on YouTube, which we used to gain our audience research.
Below shows how we were able to share on Facebook and twitter through one button which allowed us to enter our user name and password and automatically post the video on chosen social networking site and also displayed link that we used to paste to whatsapp, bbm and kick users and also many more mobile integrated messengers. 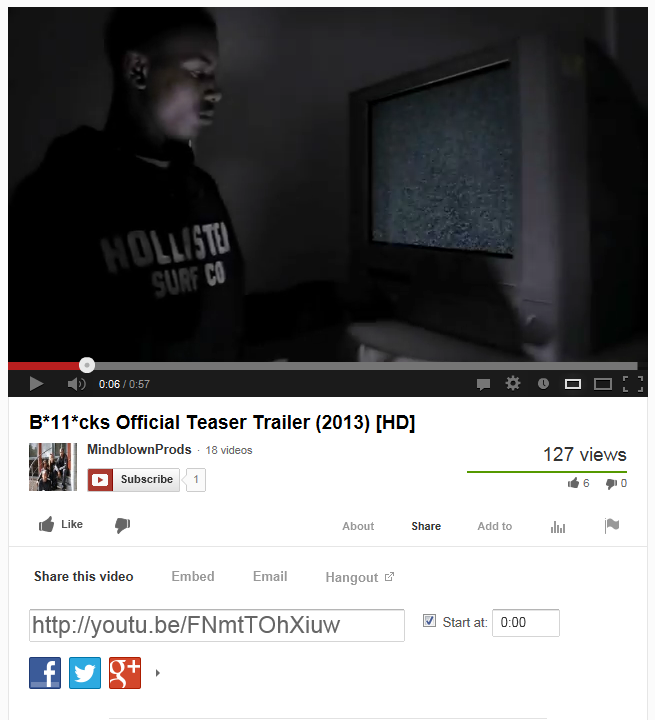
|
Above are ways we used YouTube on of these ways was to market our trailer and track the views that we had and key demographics like show below.
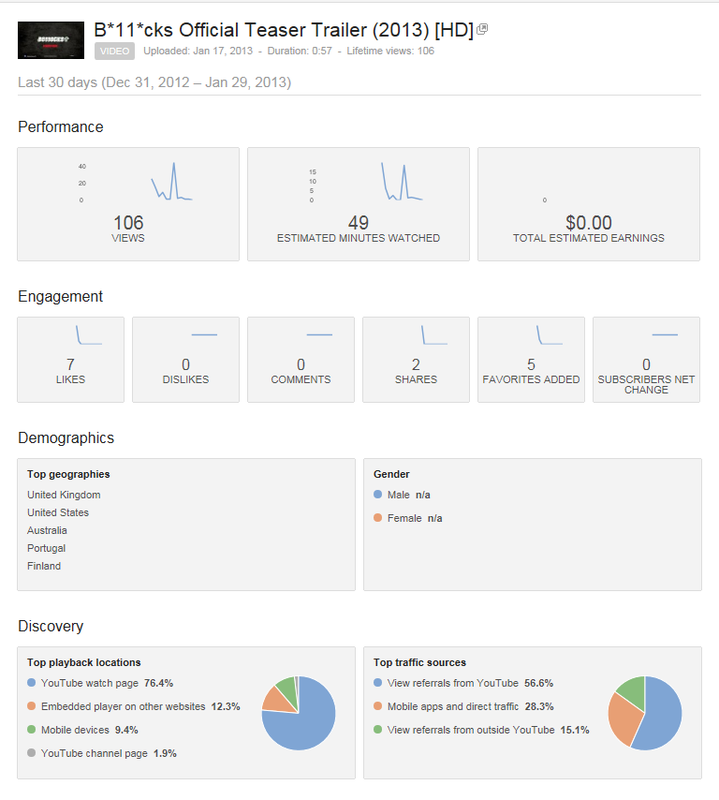
|
Moodle
We used Moodle to gain access to templates and information, this is a site were are teacher can upload data and us students can extract it instead of going to the teacher for it this is good as we can get information from home also. We used this to get templates of the storyboard.
|
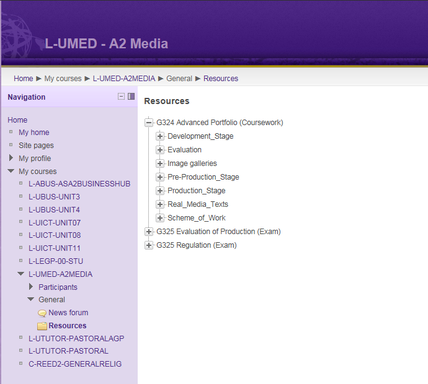
Moodle was an easy media technology to use as we all had
experience with it in some kind of way each using it for our other subjects, as in AS we were taught how to use it to our advantages. We used this media technology to acquire some of the resources we would need to construct our final products, and these were things such as existing magazines and posters that helped us analysing the codes and conventions of real media texts. Another resource we retained was call sheets and mock up sheets that were template for us saving us time of creating our very own from scratch. 
|
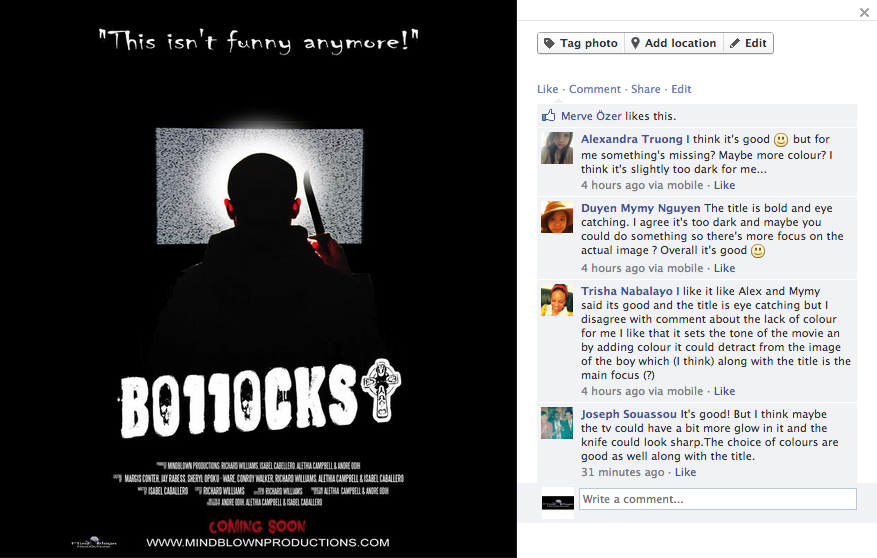
Facebook for audience research & FEedback
In our audience research we conducted primary research, which we carried out through the use of Facebook. Using facebook was easy, as being part of the young generation we use this social network a lot for social networking but the struggle was that we’ve never used this particular website to do research and also to promote, which in the end we managed to do this, being an advantage to us as we got feedback from various people allowing us to improve are final pieces.
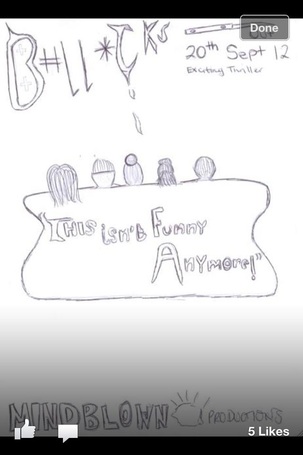
To the right indicates how we took advantage of the Facebook's like system to highlight to us the best mock-up out of the four that were drawn out for the poster. Below is some of the feedback we collected, Facebook was useful as it is laid out so that users are able to see the image while they comment there thoughts.
|
|
The kodak esp 3.21s all-in-one printer
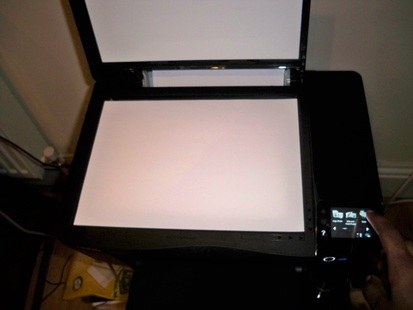
The Kodak printer was used not only as a printer but also a scanner which one of our group members used to scan the storyboards and call sheets onto the computer and the put onto our website, which was very useful.
This is a media technology that is multi-functional which saved us time from going to the different machines to utilize, the saved time was beneficial to the completion of the tasks.
This is a media technology that is multi-functional which saved us time from going to the different machines to utilize, the saved time was beneficial to the completion of the tasks.
ImaC
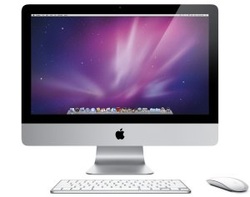
The Imac was an important media technology in the advancement of our final product, this was because we were ably to use software unique to the mac such as final cut pro so that we could edit our trailer. The Imac was used as it allowed us to do screen grabs that appeared directly on our desktop which could be used to display screen shots on our website, making it more visual.
Watching sinisterTwo of our member went to watch sinister with our media group. We made mental notes and were able to distinguish what is important to a horror film and what bits are best to include in a trailer. This greatly influenced the making of our teaser trailer and was also part of our planning and research that helped in the construction of our final trailer.
It was also important to see peoples reactions in the cinema, and see were they jumped and scream so we can have these kind of scenes in our trailer for people to be scared. |
|
Filming & Production
Whilst in the filming process we used an array of media technologies including:
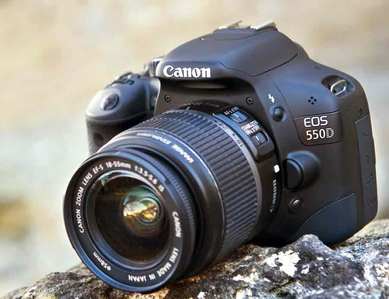
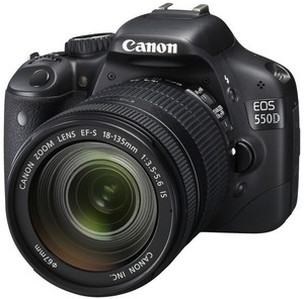
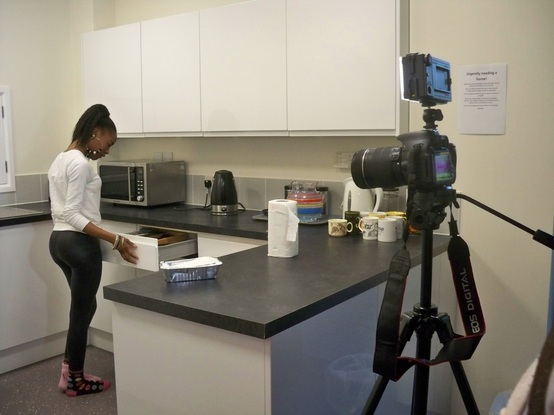
Canon 550D
|
During the process of shooting our trailer we used the Cannon 550D, allowing us to capture shots in HD providing solid quality. This ensured the trailer looked professional and was able to play back in HD 1080p. We had previous experience using a DSLR camera as in AS we had to each make a music magazine, however A2 had brought a new experience to us; had to use this camera not only to take pictures for our magazines and poster, but also to shoot moving video. One of the things that was vital in using this particular media technology, was to make sure everything was in focus first before using the video or picture. With this camera we took various test shoots, to make sure the lighting and framing was up to standard.
|
We did not practice using Digital SLR cameras to film however we had to quickly adapt to this, which worked out well in some scenes as we had a photography student on our team, who was some what used to DSLR cameras.
We also did not film test shots, but we accounted for this by producing an animatic and storyboard which we used as a skeletal structure for our trailer. So in future we will definitely practice shots to make sure we have a more smooth delivery as we were not able to film everything in the allocated time in the day. |
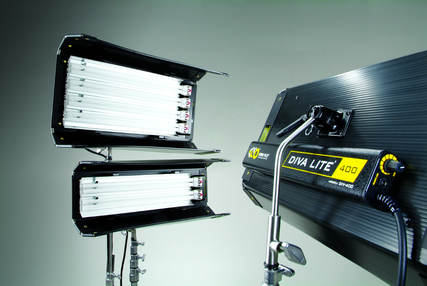
KINO FLO 400 WATT DIVA
Lighting was a huge element in both our print products and trailer this was to bring the focus to our subject and in addition reduce grain on shots that were in dark conditions. A Kino Flo 400 watt diva was a great technology that was manipulated and was also versatile as it was movable being able to be used with a stand and also held were stands could not go.
|
The Kino Flo lights were also used to reduce noise and fuzziness in shots that were dark so that they would keep professionalism and be on par with the rest of the shots. We were very advantaged by this piece of kit as it created a sense of the characters being in darkness, however we were also disadvantaged as the light often created unwanted shadows meaning we wasted some time getting the position right for the particular shot.
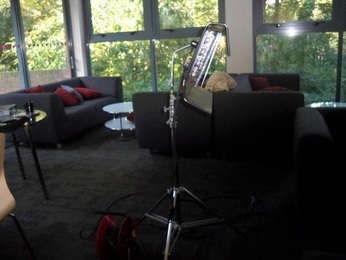
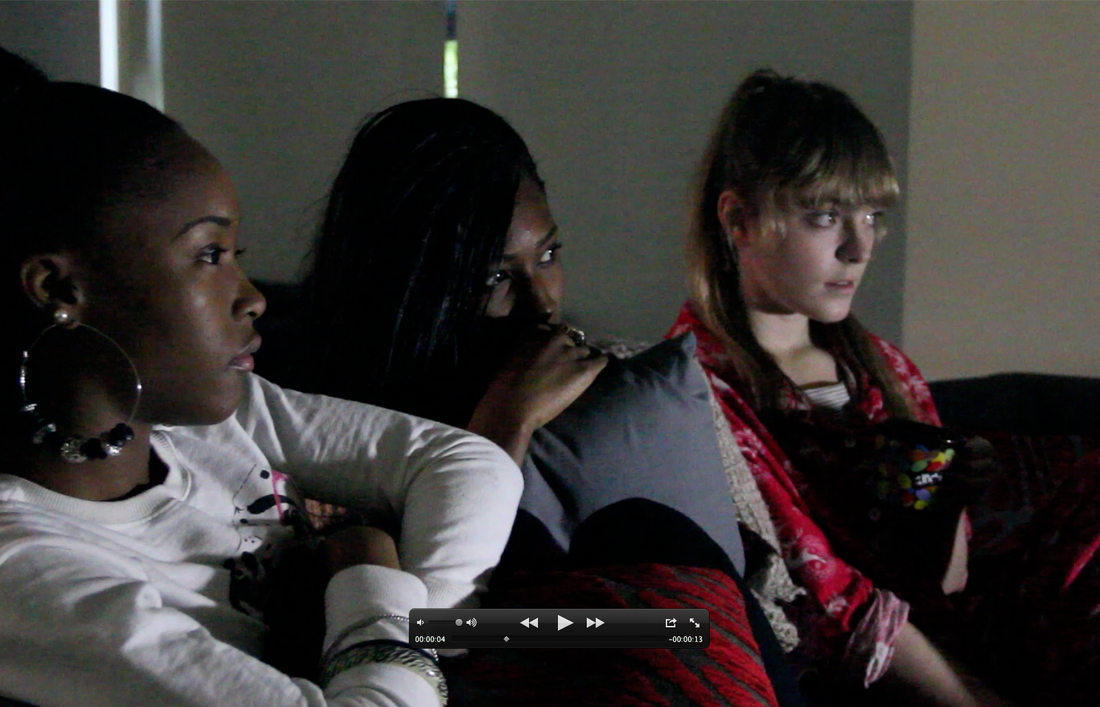
To the right is an example of were the kino flo 400 watt diva was used, we used it to implement a feel that the characters were watching a horror movie on the TV as the TV was not projecting the type we will need for our characters to be of focus in this key scene.
|
Having knowledge on how to set up this piece of equipment really saved time, this was a result of us familiarizing ourselves with the particular equipment. Time was a vital aspect of our media project, and saving it was good.
|
kailite z96 Led light
This is the light we fixated onto our cannon 500D, our group used this light to give a direct glow onto the subject and to further focus. 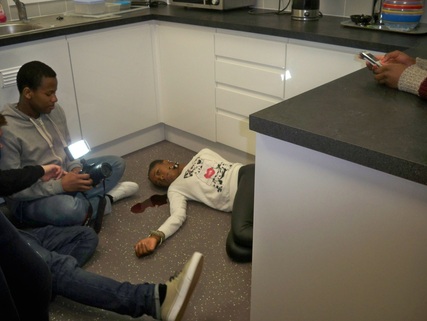
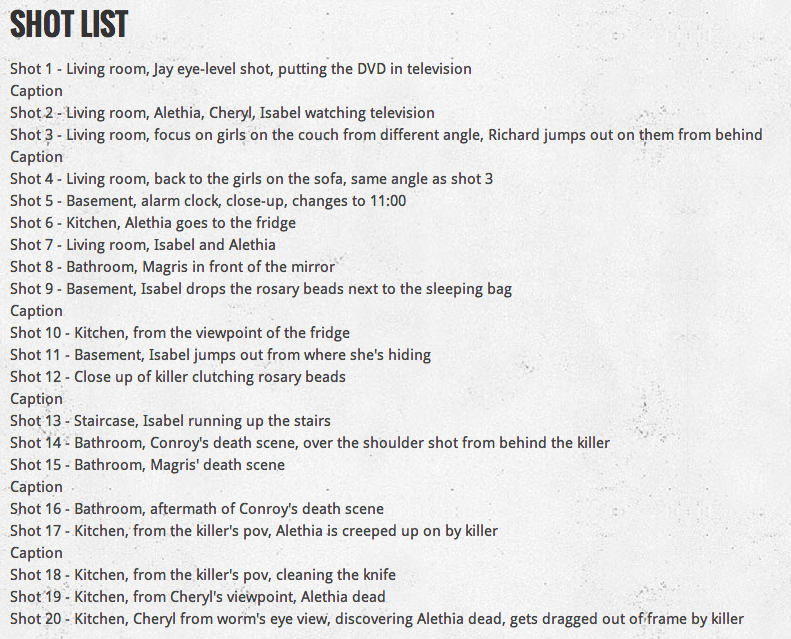
In the shot to the bottom left, we used the kalite as it was portable to lay under the subject with the light directed to his face, to furthermore give off a glow, to highlight the characters body language and facial expressions, so that the audience can become more captivated and lead to believe in the mystery of the film. ' who is the killer?' |
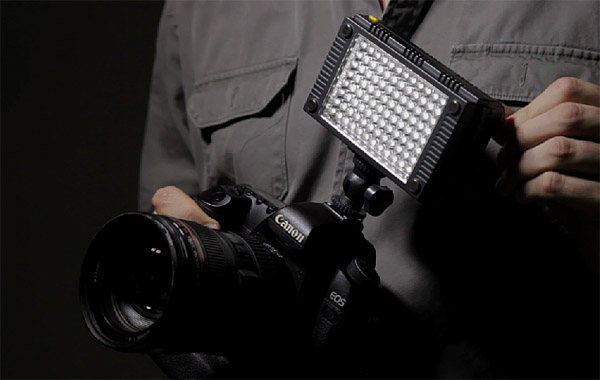
The fact that this LED light source was small, meant that it was very portable, giving us an alternative to use when the kino light could not be used in tight spaces or areas. Another benefit of the Kalite Z96 to us is that it did not require us using a plug space, and was run on batteries giving us more location that could be utilized.
We were unfamiliar to this type of equipment even as media students, and because of this we were fast to learn how to set up and use it, which saved time and made things faster. |
Tripod
|
The use of a tripod was vital for our production, creating steady shots and sustaining continuity. This was an easy to use equipment and easy to set up it was very useful as it kept the camera locked and prevented shake. Using the tripod also create a sense of realism and concentration instead of noticing shakes and wobbles.
Above is an example of were a tripod was used.
|
Iso settings
We used the ISO feature on the cannon 500D to create certain feels to our shots, one of the ISO setting we used was depth of field to create and further enhance the significance of the shot, the other ISO setting that was used was the focus this was to make sure shots were consistent and the clarity was good.
|
|
Above are example of how depth of field was used.
In the filming of our final piece the ISO (International standard organisation) feature, which relates to the industry norm for sensitivity for example 100 ISO not being that sensitive to light and 1600 ISO being extremely sensitive to light. The ISO setting can be said to be a media technology in which we utilized to construct our final pieces creating the best circumstances for our location e.g. In dark scenes putting up the ISO.
Filming
Filming was a process that didn't take too long as we had already planned out the shots and the camera angles we were going to use, however we did struggle with lighting as some of the shots we recorded turned out to be grainy, making the footage look un-sharp. When filming we had to make sure that we shot in focus because of this we took some test shots to ensure the rest of the shots would not be grainy. In shooting we made sure we didn't delete any shots as we may have been able to manipulate them later in the post production stages.
Example of a grainy shot.
|
This shot is in focus with good lighting and no grains.
|
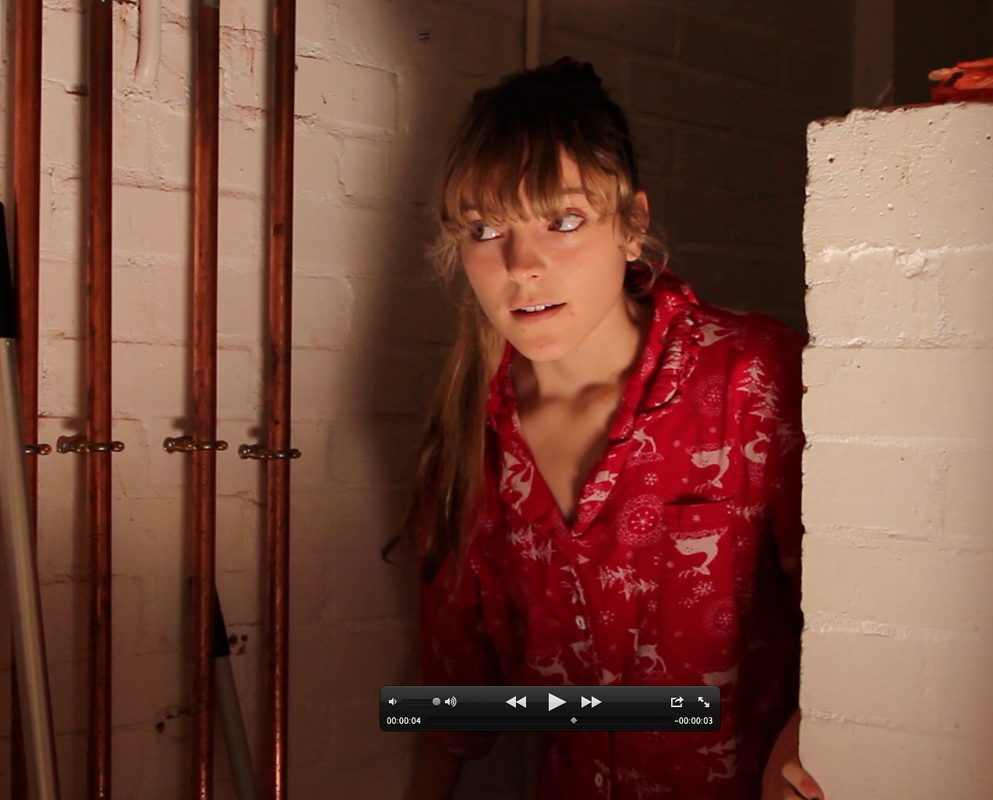
Photoshoot

Some of our photos were out of focus which we rectified to bring the subject into focus. Also in the above shot we took in landscape which we had to correct this and shoot in portrait for our poster and magazine.
|
On the other hand, this shot is in focus, we had to take many photos so that we had more choice of the best ones and ones with good lighting and focus.
|
Print production
Before we created our print production we decided to look at existing magazines and posters to get to know the codes and conventions of exiting horror print, so that we could apply this to our prints. For this we used search engines to search existing horror magazines and posters.
|
|
|
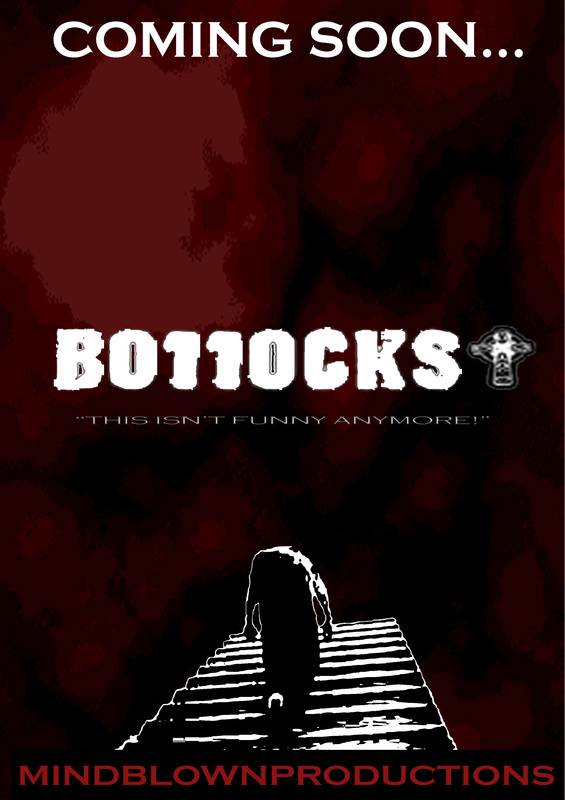
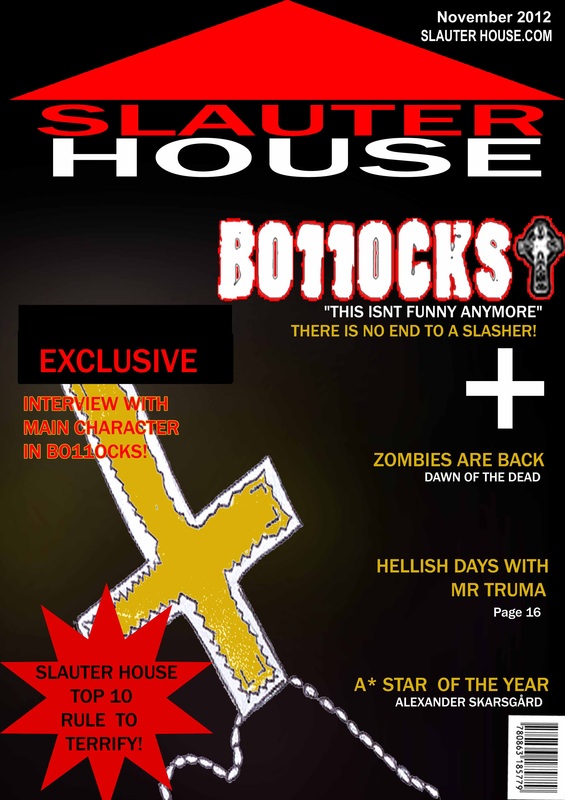
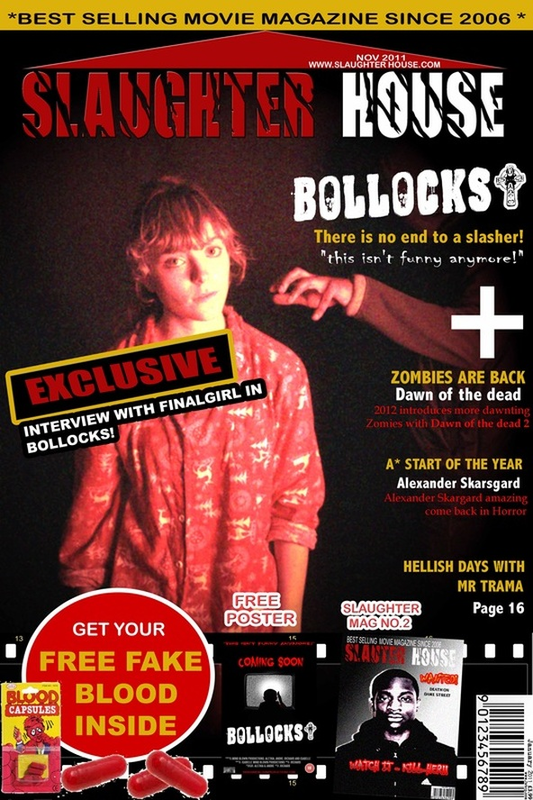
These our the magazines and posters that inspired the feel of our final print products.
Looking at professional media text gave us knowledge of real media text, which allowed us to follow the codes and conventions an with this vital knowledge also challenge the codes and conventions. We used the two search engines Bing and Google to further research existing media texts that were more or less related to our sub-genre of Psychological slasher, so that we were able to know what it was that we needed to make our poster and magazine fit and represent our chosen sub-genres which was a huge benefit to us all.
To make our mock-ups stand out further more we developed these drawn mock ups into Photoshop mock ups, and to bring it into perspective we added silhouettes, fonts and even background textures. Like shown to the right.
|
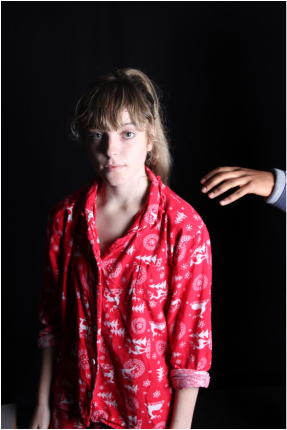
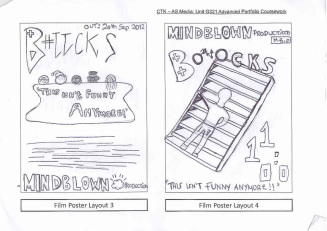
After venturing into how our media texts should be displayed and what it should consist of, we then drew out several mock-ups. This was vital as it gave us a foundation on where to work from. In this stage of print production the media technology that was utilized was a scanner as we scanned the drawn mock-ups onto our website to be displayed, which we later manipulated into Photoshop mock-ups.
|
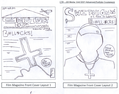
Before we begon are print production stages we developed mock-ups
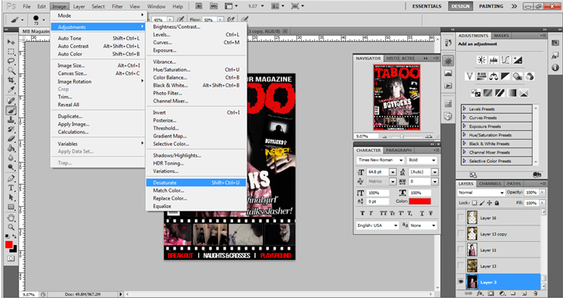
Using photoshop
|
Photoshop is a graphical editing software used to design and create, it was used to create our magazine, poster and even our team logo. This particular media technology, we had already had experienced due to having utilize it in our music magazines in AS, so we had proficient knowledge of the software. But, to develop our skills we used YouTube to search tutorials to help us further enhance our Photoshop skills.
|

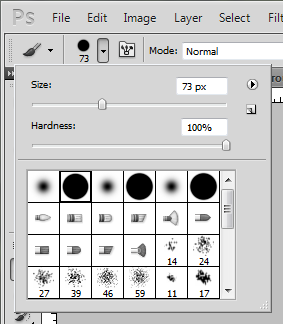
One of the other tools we used was the brush tool, which was also used in AS. However in A2 we experimented with different brushes e.g. the watercoulour brush, which allowed us to add creativity and also challenge conventions as main coverline on magazines are usually clear and easy to use. 
|
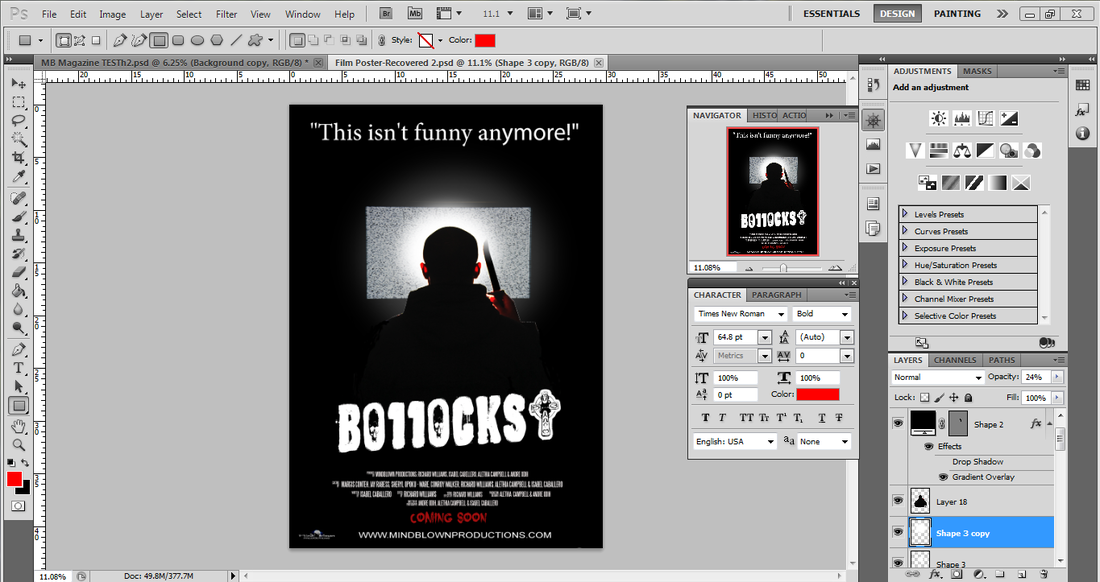
To achieve a TV glare with Photoshop we used the shape tool and altered the size of it to fit the desired location, after this we manipulated the shape by changing its colour to which and next lowering the opacity to simulate a glare from the TV which we created through Photoshop as it was actually not there in the photo shoot adding to our creativity skills.
|
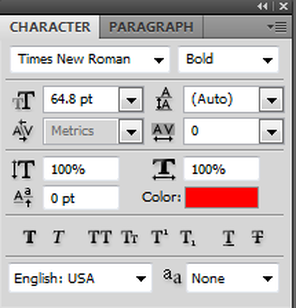
This character box was very useful as a Photoshop tool, as it allowed us to fully customize text; allowing us to make the main coverline bigger, changing the font to make our magazine more diverse, changing the colour of text and even to horizontally and vertically change the size of characters to edit to suit layout of magazine.
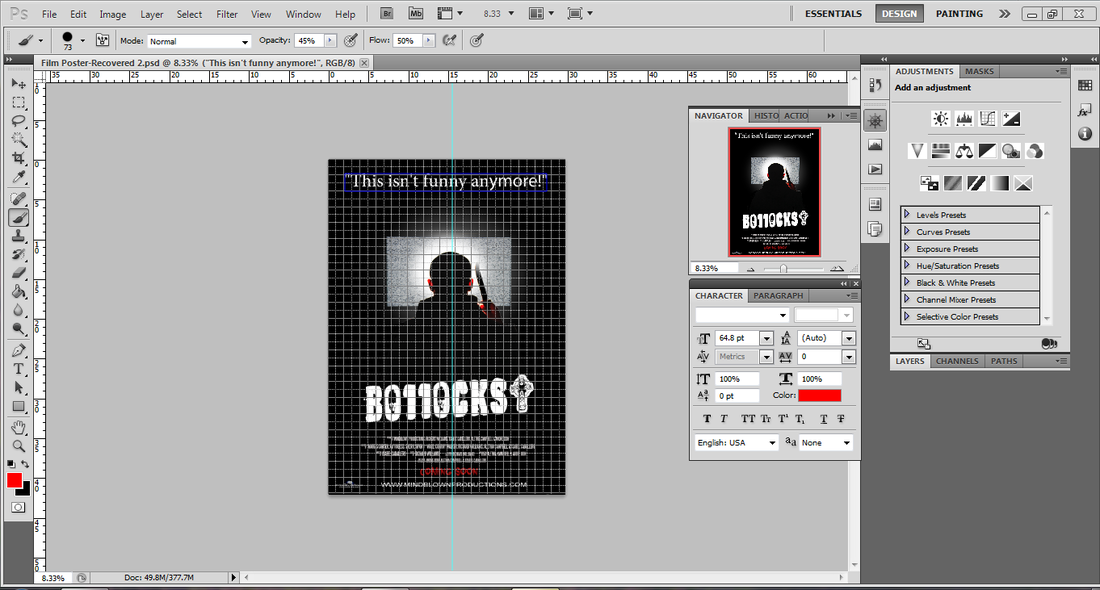
Using grids and guidelines was very important, and allowed us to make are poster symmetrical, like existing posters and magazines.
|
Desatuaration is a tool we used to make images more dull,dark and mysterious to compliment the genre of horror. This was important as we also desaturated bits of our poster and also trailer, so implementing this on the magazine main image created consistency with the three final pieces.
|
Significance of dafont.com

|
There were some what many websites we used to support the construction of our final products, and one that had great importance was www.dafont.com, why this was important was
because it allowed us to be creative and other fonts rather than the default Photoshop fonts to bring life to our final product making them look more unique. Using dafont we combined it with other media technologies Photoshop and final cut pro, we combined it by downloading the fonts and using them on both Photoshop and final cut pro. |

|
|
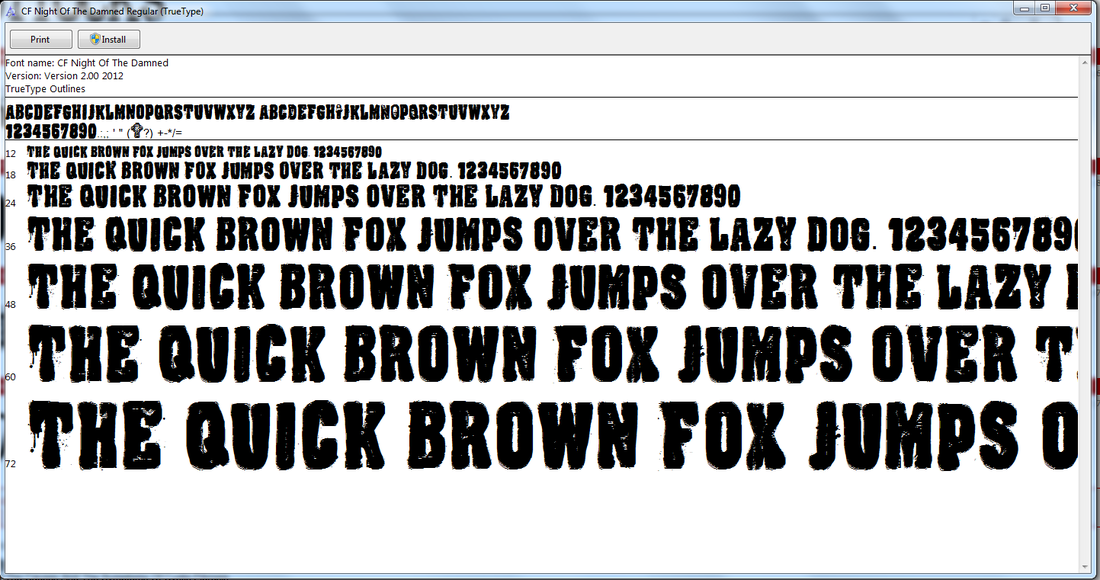
There was a process involved in downloading fonts, which began with us looking for the right font, and this was made possible by entering the name we were going to use, so we can find out how every font would look with our chosen text, the next step was to download the fonts, after our chosen font was downloaded we had to then restart Photoshop for the font to be usable.
|
The font we used was called 'CF night of the damned' we used it as it was well suited to our narrative as there is a religious theme to the psychological slasher 'Bo11ocks'. We also featured the title of the movie as the main coverline to our magazine 'Taboo' which is an important convention of movie magazines.
Our video on how to download font on Dafont.
|

We used dafont to keep continuity, within our three final pieces.
|
Editing & Post production
Whilst in the editing and post production stages of our project we used various software such as:
Final cut pro
|
During this stage we used this non-linear video editing software, to produce our animatic and also our trailer. Final cut pro allowed us to trim pieces of footage to get rid of unwanted parts, e.g. 'The 3..2..1..Action' the director shouts out, also to add video filters, text, effects, transitions, colour correction and a further array of features. This software we had to quickly adapt to as non of us had experience with final cut, but rather other video editing software such as Sony Vegas pro and windows movie maker, which gave help as final cut contained some aspects of them such as the timeline and other features but was minimal as it was only available on i-mac which most of us only used as the project began.
Above screen grabs show and highlight the importing process and shows it for our trailer.
|
Editing was a long process and started with us drawing out a storyboard, which we scanned in and cropped to fit into a animatic.
The animatic we developed had to follow a real trailer in terms of cut, transitions, pacing and also montage speed. So for our first animatic we used 'The Eye Trailer', this involved us putting the trailer cutting it were cuts have been displayed and fading also on the timeline and importing our storyboard cut outs and using the real trailer as a guideline to cut our animatic.
|


|
|
|
Above shows how we used final cut to create a animatic, we shortened the original trailer to fit the length of our task as the trailer was 2:08 mins which was longer than the minute our project trailer had to be.
|
Final cut was also used to give our footage a horror feel and tone, and this was done by the use video filters, colour correction and saturation levels.
Vignette is a filter that we utilized, we used it to give a subtle oval around the shot that further focused the footage to the central position to make the audience more concentrated on main subject. How this particular effect is, shown on the right. On the 'Filters' tab we were able to see what effect is being used and we could further manipulate the effect by altering its 'size' and 'blur amount'. 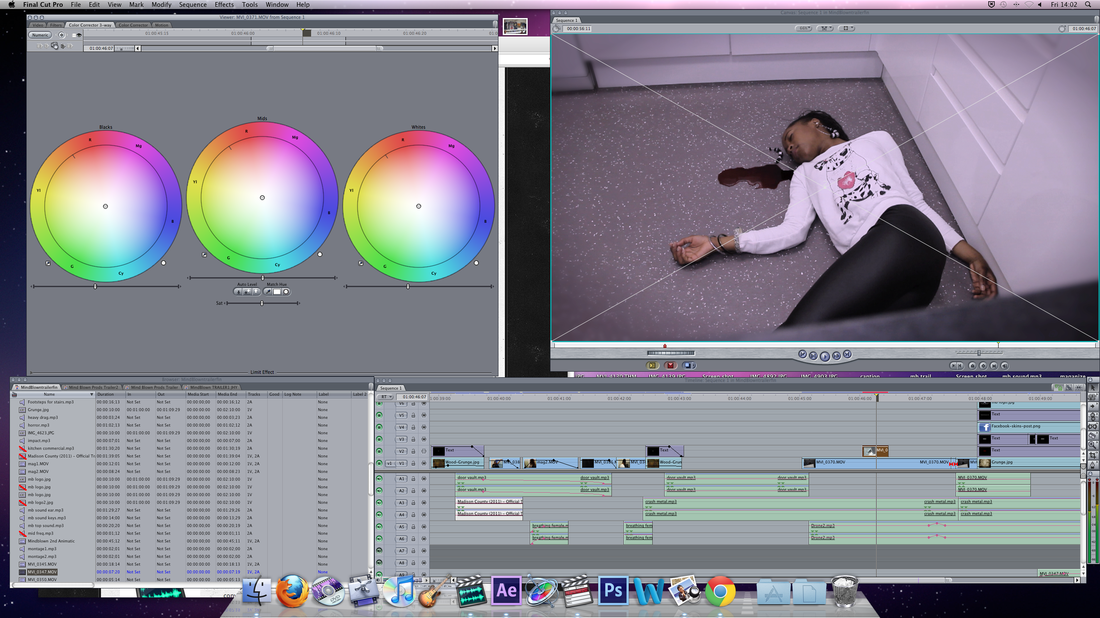
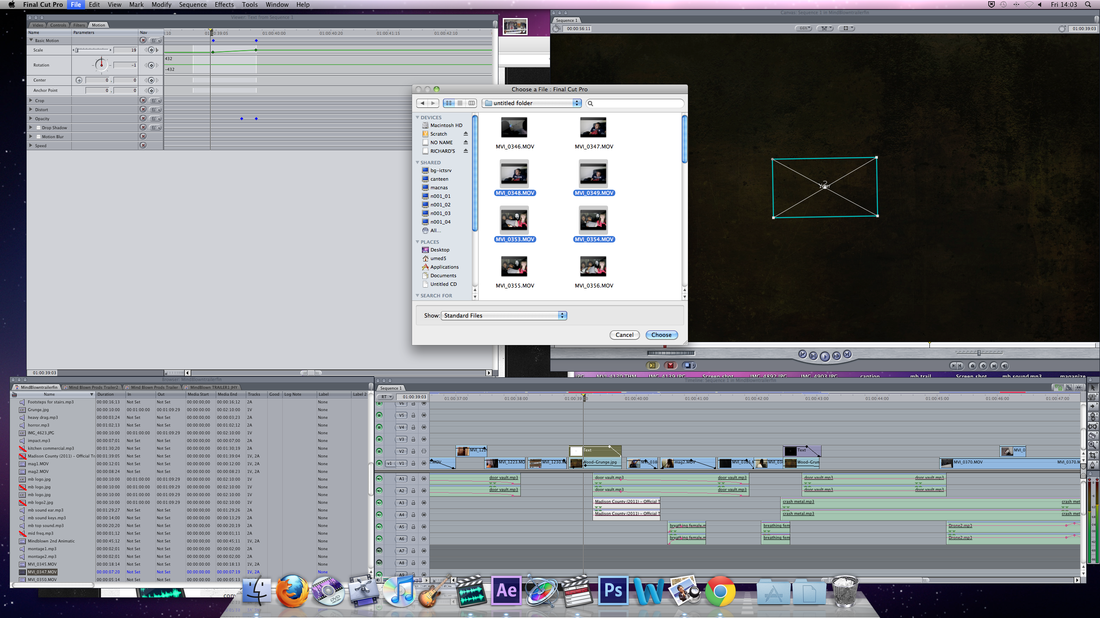
Colour corrector 3-way
|
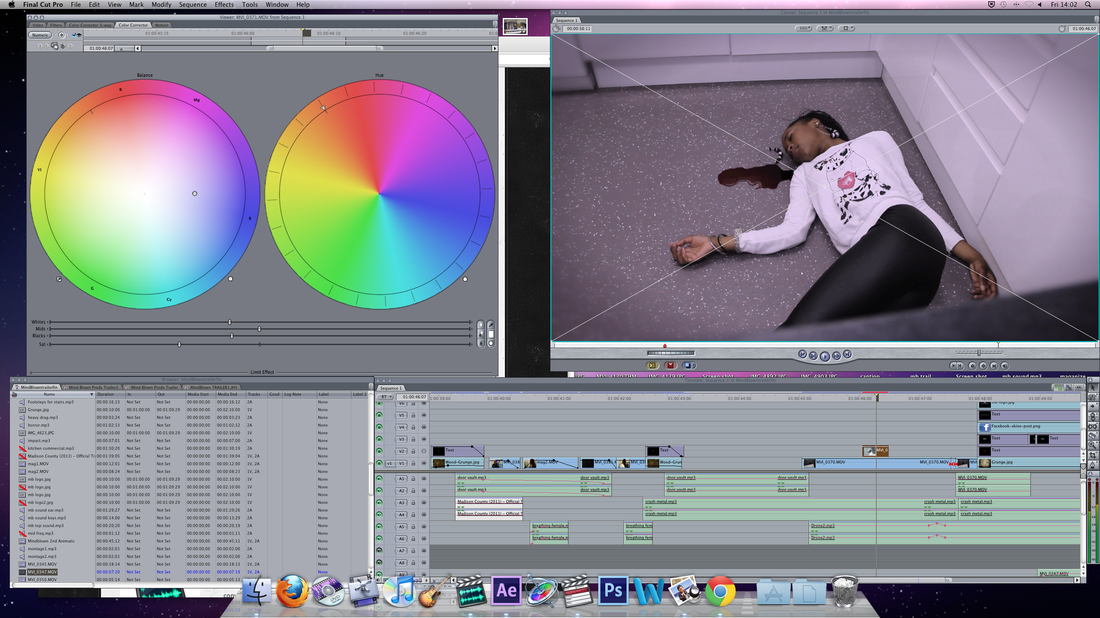
Colour corrector
|
We used the colour correction tool/option to give our trailer a cold, dark and dull feel, as this is what horror trailers usually portray, this is highlighted by the image on the right which shows the corrector drawing to the blue side which connotes mystery in which we wanted our trailer to connote from our treatment. Also we desaturated our footage, as horror movies are not colourful, this gave our trailer a more eeire look and was likely to make the audience more serious due to the desaturation of bright colours. Furthermore, we decreased the amount of black in the shots through colour corrector 3-way and colour corrector to contribute to the blue dark feel we wanted to portray in our final trailer.
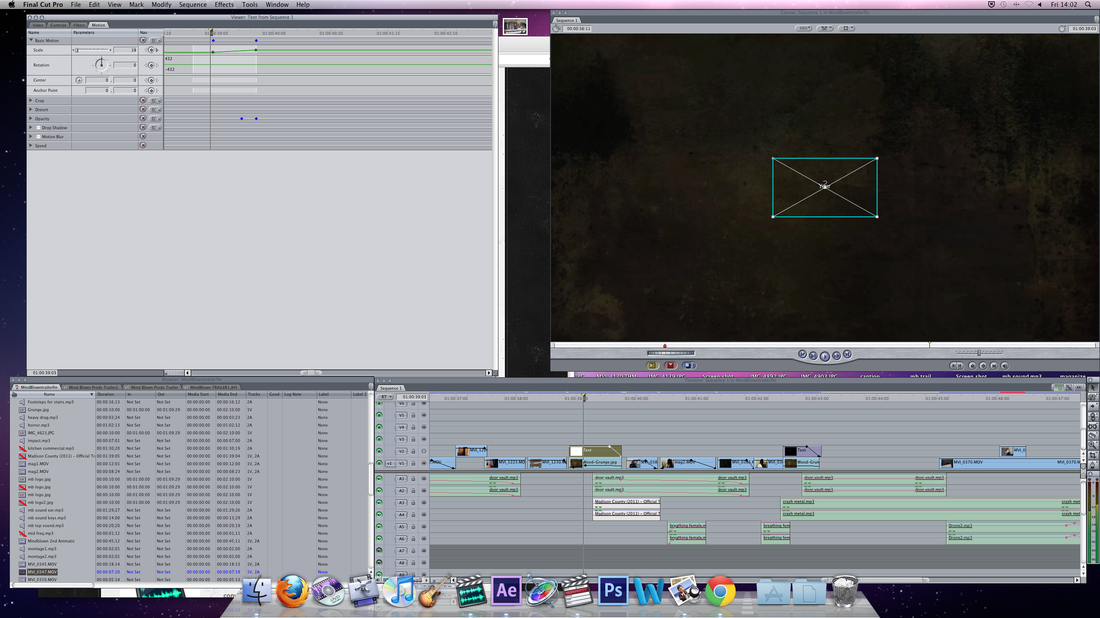
We took advantage of final cut pro, In making our captions this was down to the fact that the software allowed us to use key-frames to create movement in standard text, in our trailer the captions came fast towards you, which was used to grab the audiences attention. We achieved this by making the first key-frame smaller in size and the last large so growth will be made in between.
|
|
Example on the left.
With our captions we used the media technology search engine Google to search for grunge textures and background which we could place at the make of our text to avoid it being to plain. 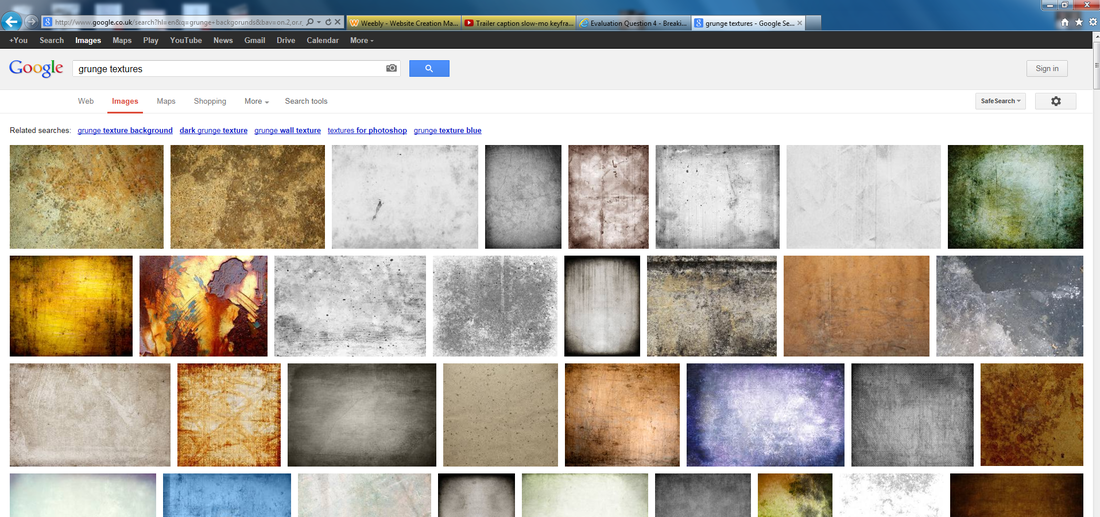
We chose one of these textures and darkened it on final cut, to keep consistency with our dark and mysterious feel, we wanted to exhale.
|
The final step of editing was to export our trailer using QuickTime conversion and make it HD for 1080p playback on YouTube which final cut made easy to navigate to this option.

Quicktime
|
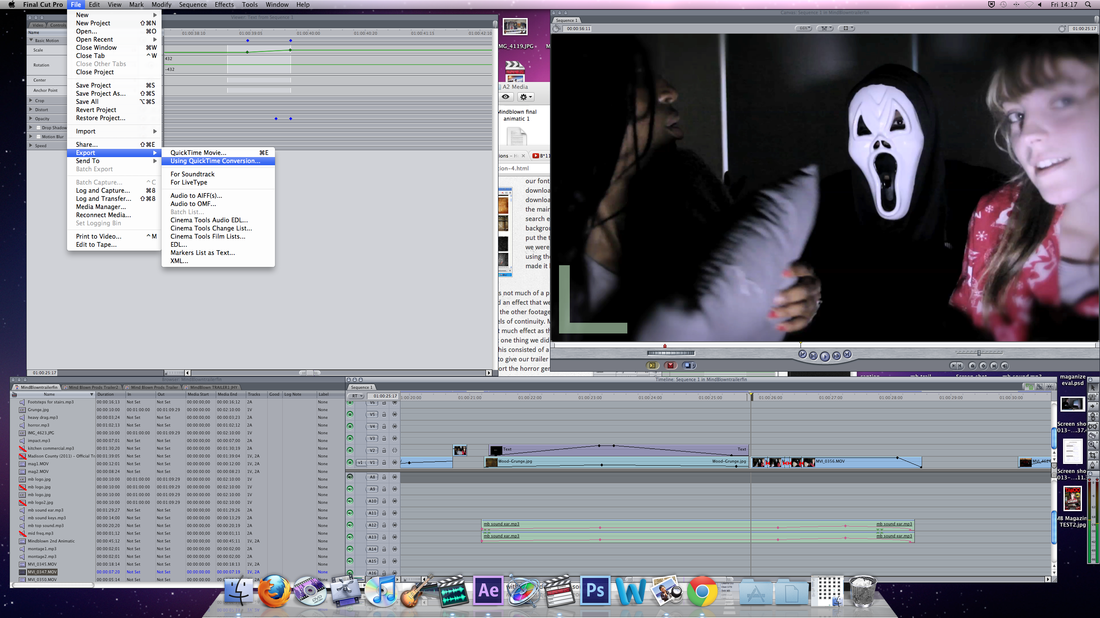
Quicktime convertion
|
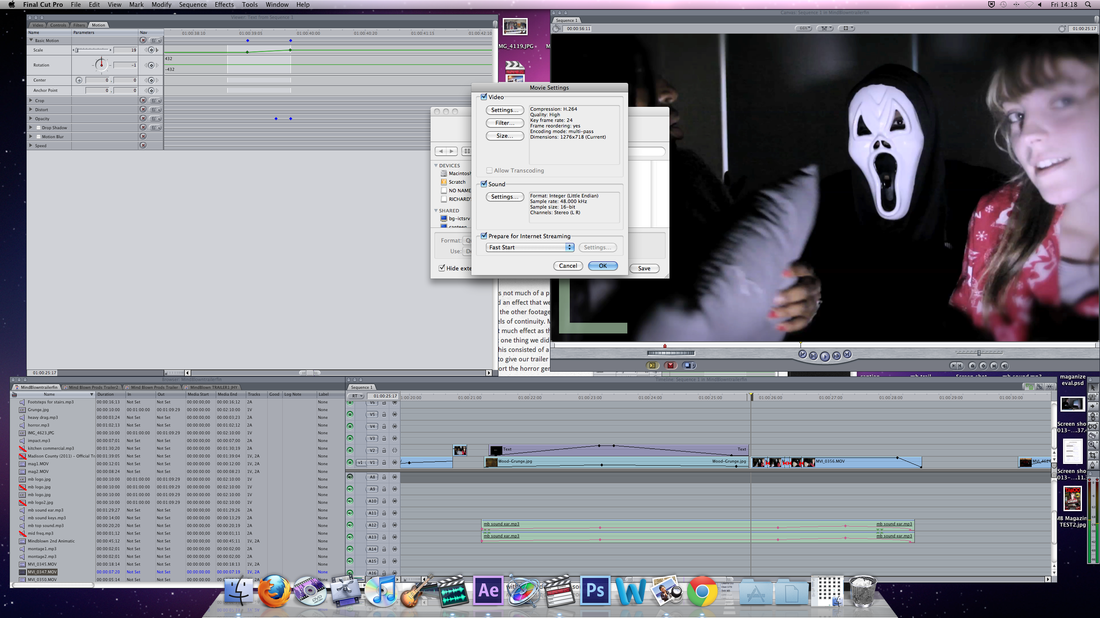
Quicktime conversion settings
|
using soundtrack pro
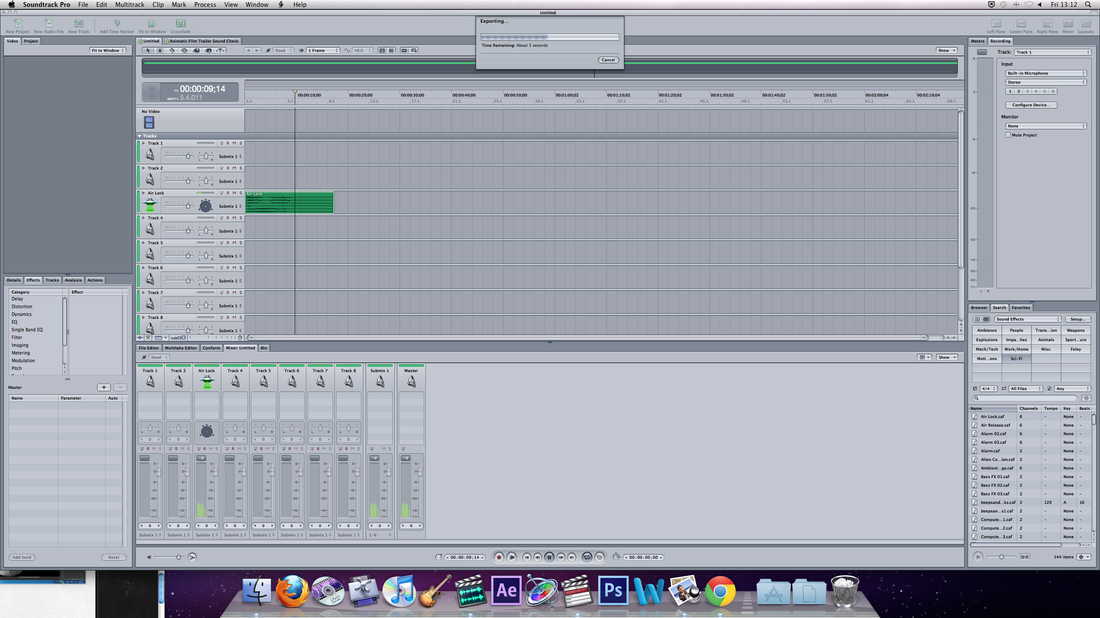
One of the software we used for the sounds was Soundtrack Pro, which is only
available on Apple products. Soundtrack pro was very useful to the completion of our trailer as it allowed us to compile a large number of mp3 files in which we used to build up our trailer sound.
available on Apple products. Soundtrack pro was very useful to the completion of our trailer as it allowed us to compile a large number of mp3 files in which we used to build up our trailer sound.
|
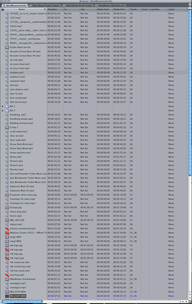
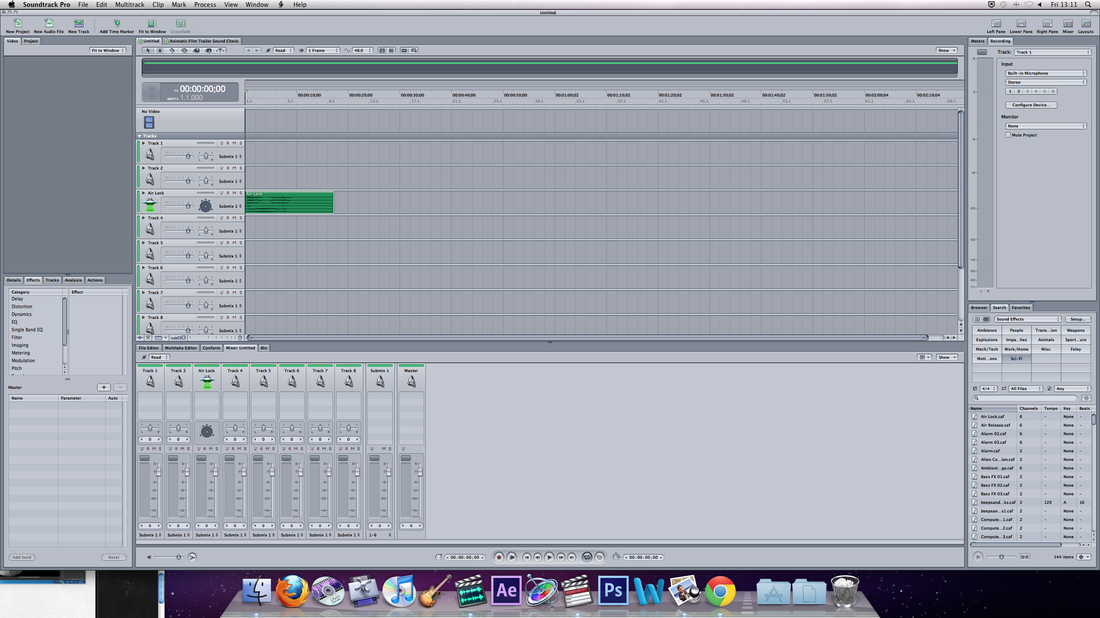
Soundtrack pro was home to a vast amount of mp3 files, which were sorted into categorical form which allowed us to benefit from its ease of use. This allowed us to pick from Foley sounds to even sci-fi sounds giving us space to be creative. Soundtrack pro also allowed us to manipulate sound in which we reversed a sound of a alligator to create a more eerie sound.
|
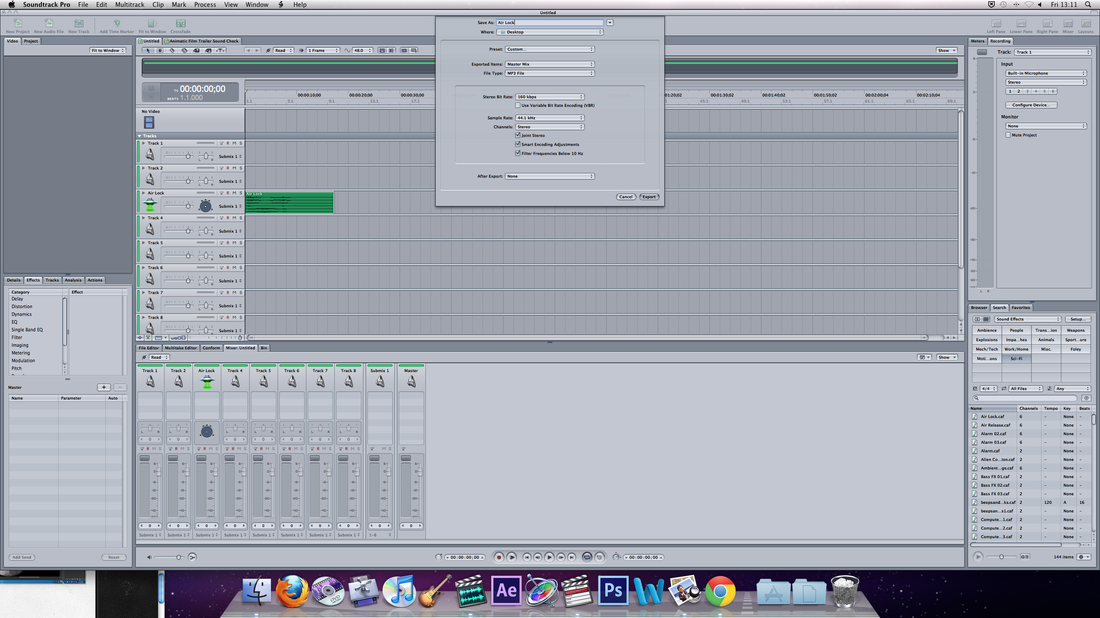
After listening and altering a sound that fitted our trailer we, exported it into an mp3.
|
Sound being exported.
|
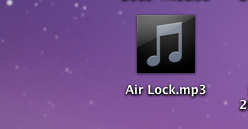
After exporting this is how the mp3 was displayed on the desktop.
garage band

|
We also went onto GarageBand which was another software that allowed us to
compose sound, where we made an erie sound, by going onto 'Synth Textures', and choosing 'Goral Atmosphere'. I then held down two keys on the keyboard, for the sound to play. However, our use of garage band was minimal, as we only used it for a few sounds and to keep create a small beat used near our montage, which was done by us typing on a virtual keyboard creating sound. |
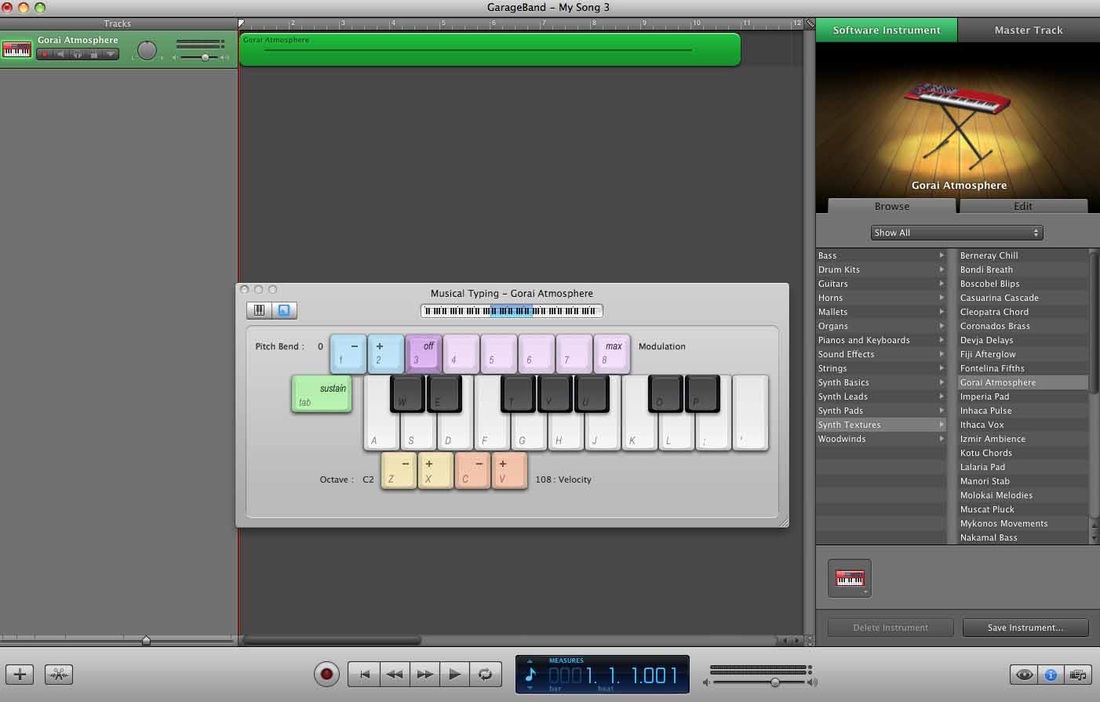
Garageband had a lot to offer like allowing for voices to be recorded but we did not utilize this as they needed outputs such as mics that were not of good quality.
|
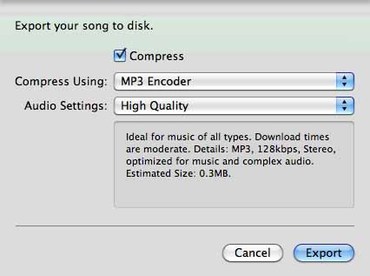
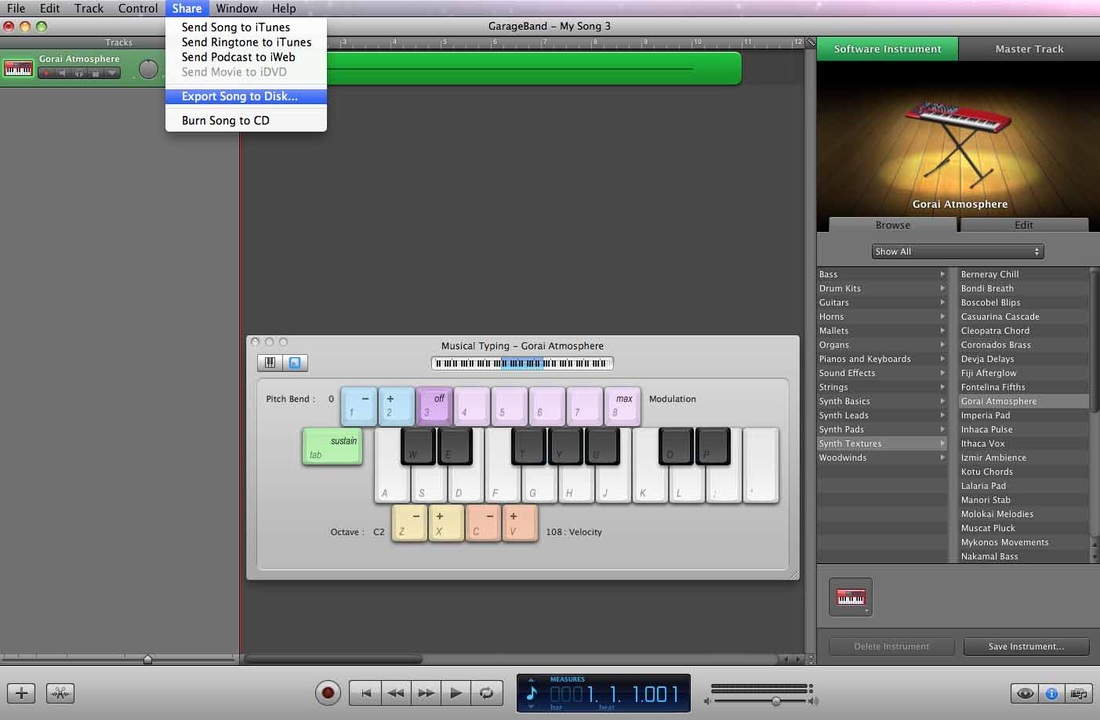
Once we were satisfied with the sound we produced, we went onto 'Share', then 'Export Song to Disk. A box will then appear, asking what type of file you want to compress the track, and what quality you want your track to be in. This allowed us to put it into our trailer and further manipulate.
|
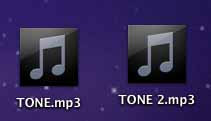
After exporting this is how the mp3 was displayed on the desktop.
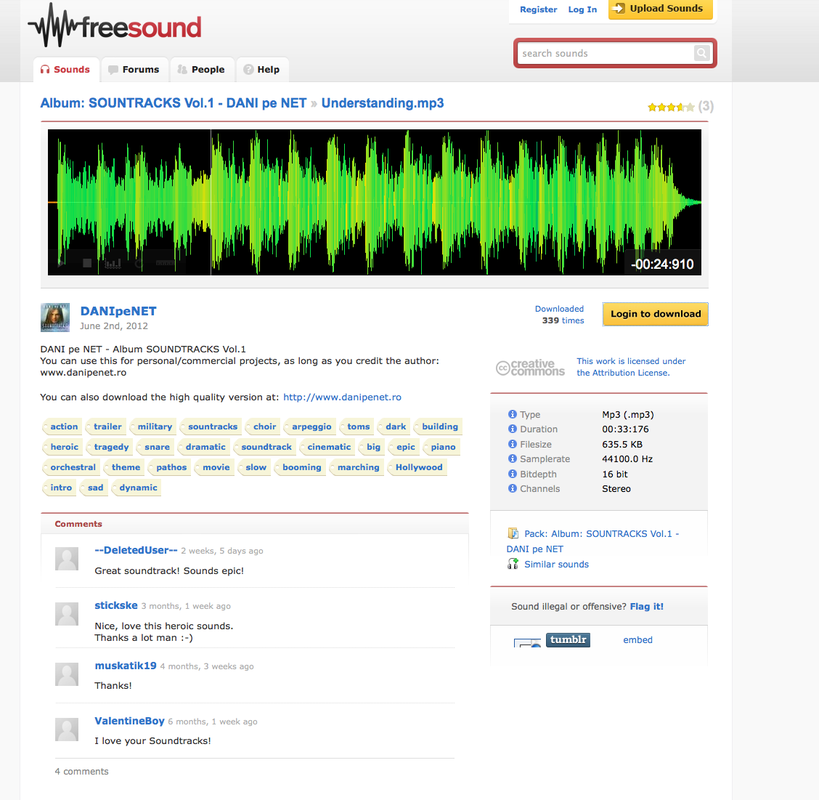
freesound.org
www. Freesound.org is a website that users can share their sound creations on to the community and are free to download.

|
We used this website to get various pieces of sound that ended up being incorporated into our teaser trailer. The most important sound we received was the main part of our montage and the creator allowed us to use it as long as we gave credit to him and the website, so this is what we did so we did not run into copyright issues.

On the left is the request for us to credit them, to use the sound. Above shows how we credited them in the description.
|
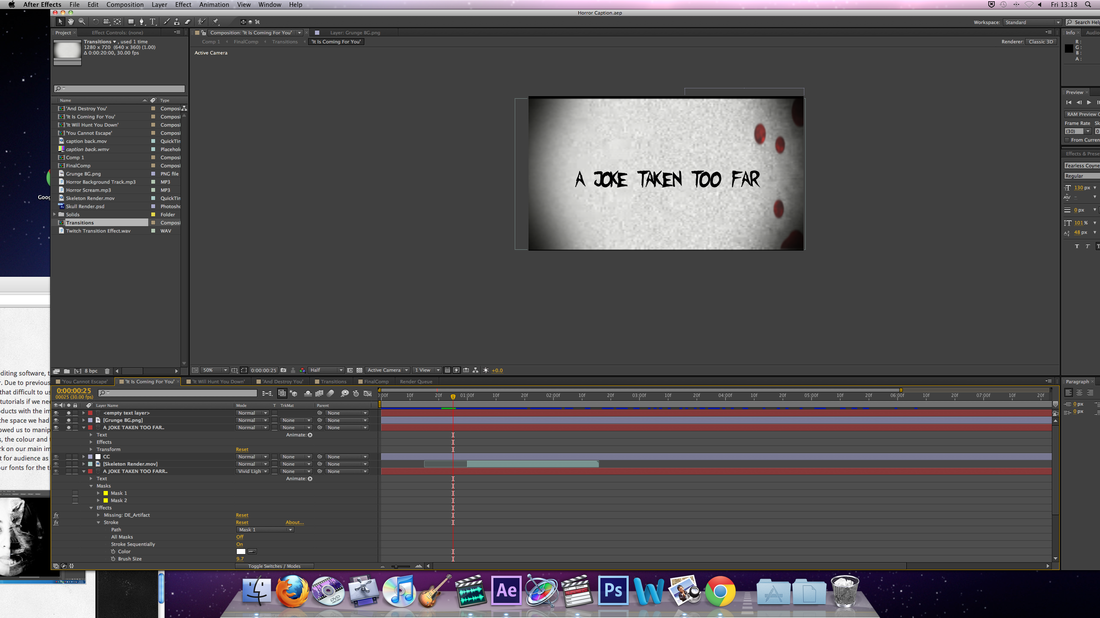
Adobe after effects
|
Adobe after effects is a motion graphics and compositioning software published by Adobe software. We used this to create a moving graphic for our production team that will appear in the beginning of our trailer which is a convention that features in a lot of trailer briefly, to highlight the company/s that were involved in the production of the movie.
|
|
Our use of After effects was limited due to only using it with the the logo, however, it was experienced with making our previous captions which we got rid of as it did not look very professorial and more cartoonish and amateurish.
|
This was formulated on After effects, we did this by, clicking 'effects' then 'simulation' and lastly shatter, creating the shatter of the jpeg image of our logo we then altered the shape pattern to brick so it looks more 3D. To view this we made the view rendered so we can alter the options whilst we watch the rendered shatter.
|
Maketing
The internet was the foundation of our marketing strategy, which was due to the fact that we did not have a budget. YouTube was were we displayed our trailer and we were given a unique Url, which we used to post of Facebook, twitter, bbm, e-mail and many more.
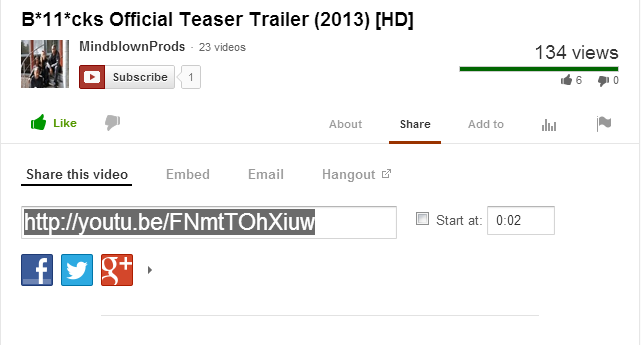
YouTube gave us the option to share instantly with a click of a button and even an option to copy the url and pace it elsewhere for marketing purposes.
|

Posting a video response is also a part of marketing strategy, as we posted video responses on popular videos, so that a large audience of people, giving them the option to be able to click the video and view.
|
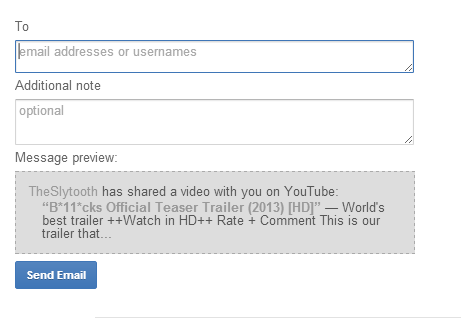
We were able to input e-mail addresses of friends for our trailer to be directly sent to them, this however was a problem as we could only send three e-mails every 20-30 minutes.
|
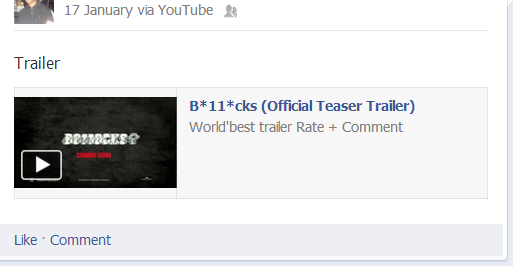
We also posted the link onto our Facebook pages, so that our friends using Facebook had the option to view and also share to their friends.
|
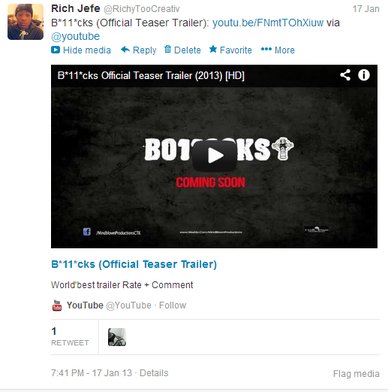
Twitter was also used for our market strategy as it allowed followers to be able to view trailer and also retweet, which allows their followers to view the trailer.
|
Conclusion:
Overall, working on this project was good for mindblown productions. We developed ways to have patience with each other and communicate to get ideas across. Working as a group allowed us to be able to know what the industry is like in terms of deadlines, editing, call sheets and meeting for example and because of this making sure we cooperated in order o achieve are aim and objectives. As all our members had different skill sets and were experiences in different areas in we utilized this to save us time and have for example Andre and Alethia working on moodboards and mock-ups as they were graphics students who used Photoshop a lot, rather than Isabel as she didn't have as much experience, also Richard was made editor as he had previous experiences with editing using Sony Vegas pro to make YouTube videos. To sum that point up, saving time was very important as it allowed us to have contingency time to work on extended tasks and even make our website more visual. Media technology was a huge factor of the project as it was used from research & planning all the way to post-production in order to construct our full coursework project. Some media technologies were tricky but learning to use them through other media technologies such as YouTube mad the process more easier to work with, we have come along way from AS as we have learnt that in mainstream media a lot of group work takes place and you have to learn to get along, as you would not want to dwindle chances of your product being worst than its potential due to conflict. To compile and sum everything, this project would not have been a success without media technology, as it was essential we used technology in order to promote, manipulate, create and save time.
